Add and edit products
A product is one thing you sell. This is where you set its price, add photos, and build out sizes or add-ons so it's ready to ring up.
Where to find it: open Menu, go to the Products tab, and tap New product, or go to
/menu/products/new. To change an existing one, tap the more actions button on its row and choose Edit.
This is a paid feature. Check that your current plan includes it before you rely on it. Open Plans and subscription to compare plans and upgrade.
Before you start
- Add at least one category first, so you have something to file the product under. See Build your menu.
- Have your price and a photo or two ready.
Steps
- Open the Menu screen, switch to the Products tab, and tap New product.
- Under General, type the Product name, for example "Jollof rice + Chicken".
- Choose an Inventory type: General, Finished good, Ingredient, or Raw material. Pick General or Finished good for anything a customer buys. (Ingredient and Raw material are stock-only items and hide the pricing extras below.)
- Add a Description if you want. This is the story customers read.
- Under Pricing & inventory, set the Sale price (₦).
- Choose a Unit (how it's sold, such as each or a pack) and add a SKU / code if you use one. The SKU is optional.
- Tick Allow back-orders if you want to keep selling once stock hits zero. Leave it off to stop sales at zero.
- In the sidebar under Organization, set the Status and pick the Category.
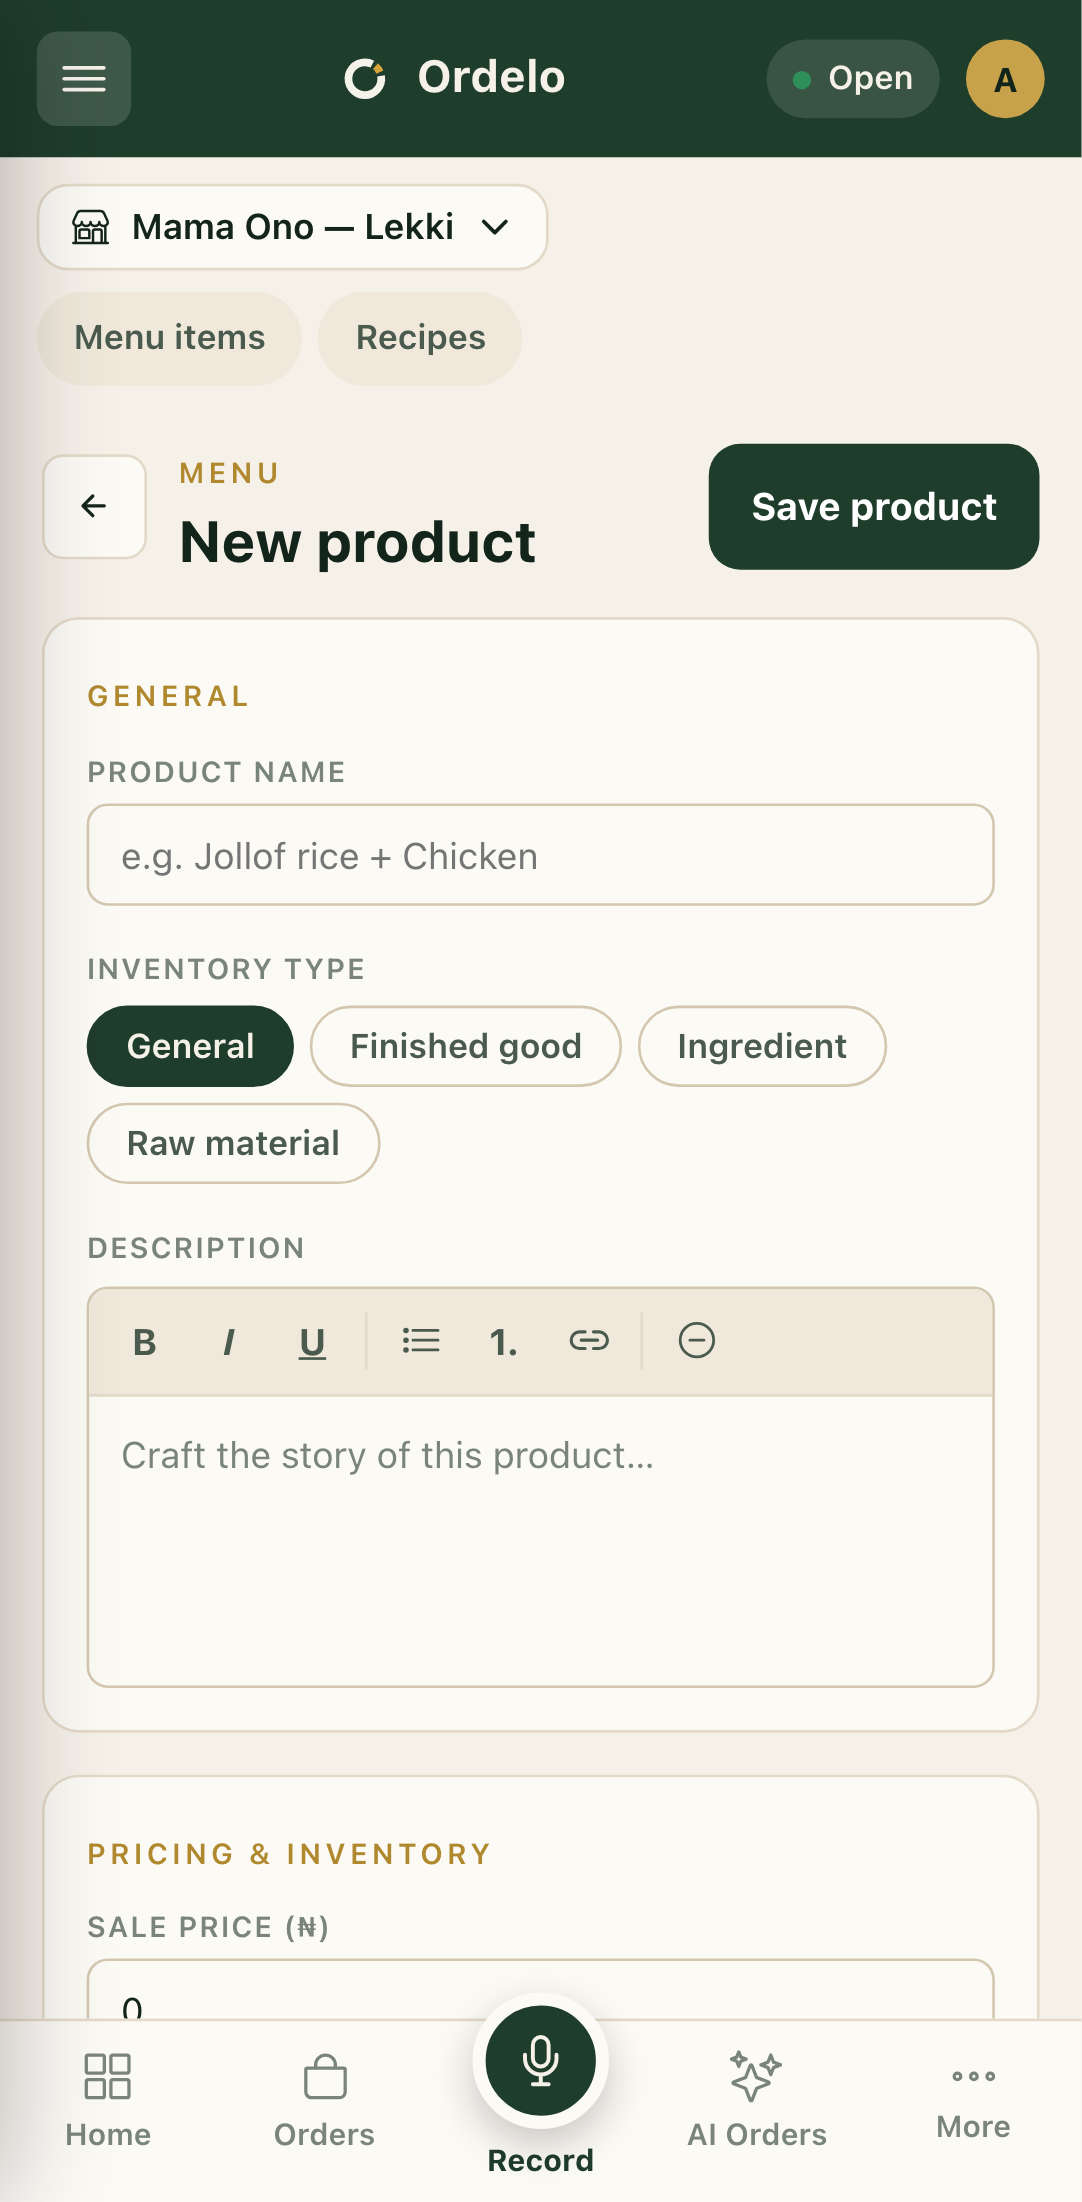 New product form
- Tap Save product. You return to the menu with the product added.
Add a photo
For customer-facing products, an Images card appears. Tap Add image, pick a photo, and repeat for up to 4 images. Tap Set default on the one you want shown first. Use the X on an image to remove it.
Add sizes, proteins, or add-ons (variants)
Use variants when one product comes in choices, like Small/Large or a choice of protein.
- In the sidebar, under Variants, tap Manage variants.
- Tap Add option and give it a name, such as "Size" or "Protein".
- Set the option Type: Single select (pick one) or Multi select (pick several).
- Tick the settings you need: Required (the customer must choose), Has price (each choice adds to the price), and Track stock (count stock per choice).
- Under the option, add each choice with Add variation and name it, for example "Large". If you ticked Has price or Track stock, fill in the Price or Stock for each one.
- Tap Save options to return to the form, then Save product to save everything.
Tips
- Stock isn't typed on this form. The product form has no stock box. Set and adjust stock on the Inventory screen, or from the Manage stock action on a product row.
- A price is required, unless a variant carries it. If every size already has its own price (with Has price ticked), you can leave the sale price at zero. Otherwise the sale price must be more than zero to save.
- Name, category, and unit are required. If Save product won't go through, one of these is missing.
- Ingredient and Raw material hide the extras. Photos, variants, availability, and pre-order only show for General and Finished good products. Switch the inventory type if those cards are missing.
- Editing works the same way. The screen reads Edit product and the button stays Save product. Changes to photos are reconciled when you save.