Reservations
Keep the day's bookings in one place. Take new reservations, approve requests that come in, and move each booking through confirmed, seated, and completed as guests arrive.
Where to find it: open Nav → Dine-in → Reservations, or go to
/reservations.
Plan
This is a paid feature. Check that your current plan includes it before you rely on it. Open Plans and subscription to compare plans and upgrade.
Before you start
- Set up your floor first so you can seat guests at real tables. See Manage tables.
- The screen shows one day at a time. Use the date picker at the top to move between days.
Steps
- Open Nav → Dine-in → Reservations. The top row summarises the day: Bookings, Pending, Seated, and Guests.
- Pick a day with the date box in the top corner. The list and the summary follow the date you choose.
- Handle any incoming requests. If there are booking requests, a Booking requests card lists them with the guest, date, time, and party size. Tap Approve to accept or Decline to turn one down.
- Filter the list with the chips (All, Pending, Confirmed, Seated, Completed, Cancelled) to focus on one stage.
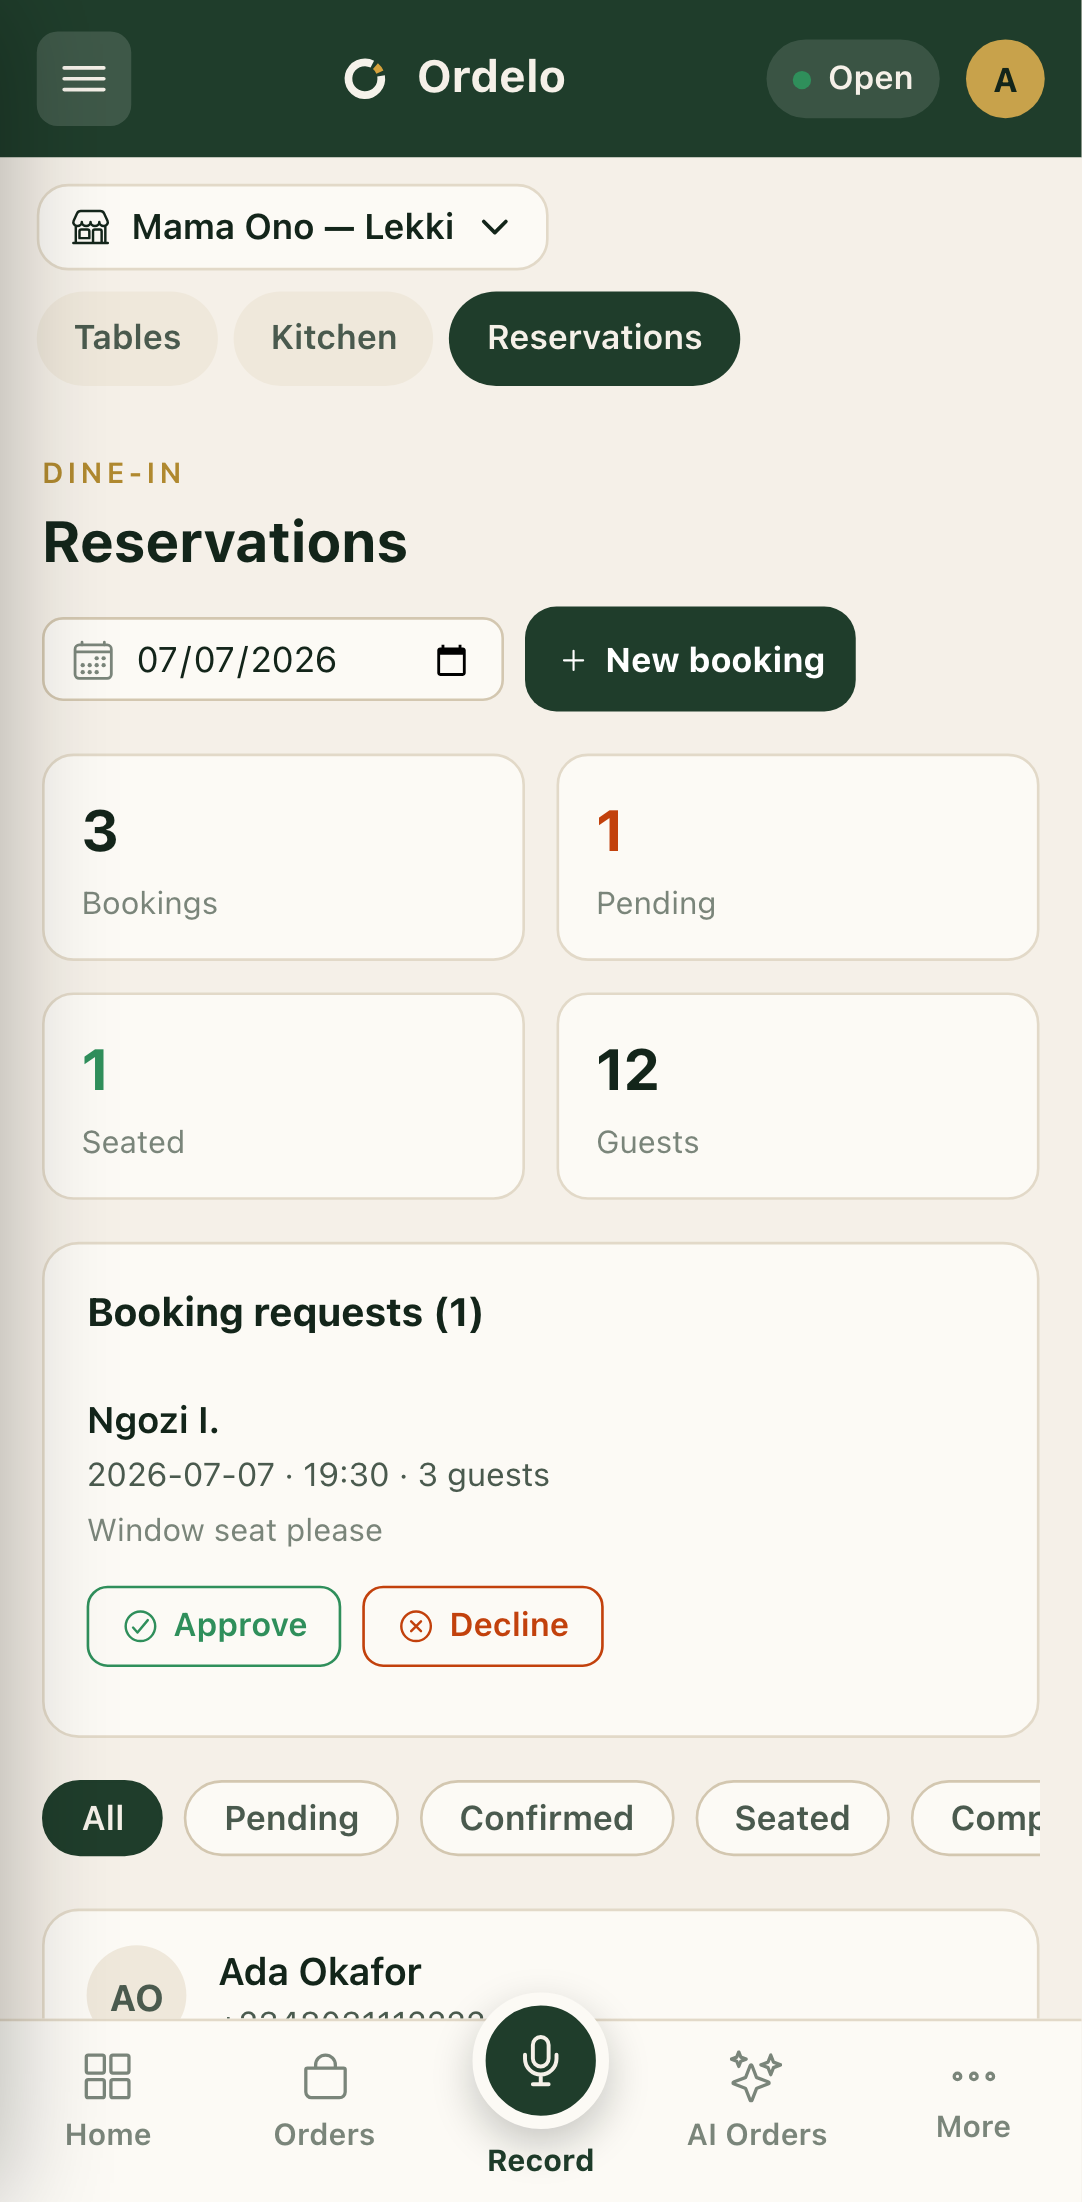 Reservations
- To add a booking yourself, tap New booking. Fill in the Guest name and Phone, an Email if you have it, then the Date, Time, Party size, and Duration. Choose a Table or leave it on Auto-assign later, add any Notes, and tap Create reservation.
- Tap a row to open its actions. Depending on its stage you can Confirm, Seat & order, Complete, mark No-show, or Cancel.
- To seat a party, tap Seat & order, choose a free table that fits the group, and the app seats them and opens a dine-in order for that table. An already-seated booking shows Start order to ring it up directly.
Tips
- Only tables that fit show when seating. The seat list shows available tables with enough seats for the party. If none fit, free a table or adjust the party size.
- The actions on a booking depend on its stage. A pending booking can be confirmed or seated; a seated one can be completed or started as an order. You'll only see the buttons that make sense.
- Seat & order links the booking to the bill. It carries the table and reservation into the POS, so the order ties back to the reservation. The order isn't saved until you check out, so backing out leaves the party seated without an order.
- Declining or cancelling notifies the guest. Both let the customer know, so use them rather than deleting a booking quietly.
- VIP guests are flagged. Regular and premium guests are marked on the list so you can give them extra attention.